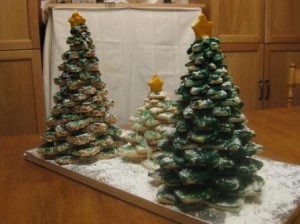
Last year I tried something new. I wanted something fun for an extended family Christmas gathering that would be different from the normal fruitcake, chocolate balls, shortbread and tarts. A friend of mine told me about something she’d seen called a Christmas Cookie Tree. I did a little ‘googling’ and got fairly giddy about making a few for the gathering as an edible centerpiece. It went over exceptionally well and I ended up making a few more for other Christmas events we had.
It is quite easy. You can pick up a set of Star cookie cutters in 10 sizes at bakeries, cake decorating shops or, if you are energetic, you can make patterns on paper and then cut out the cookies with a knife around the edges. You can also find them here.
Make a double batch of your favorite sugar cookie recipe. Cut out two of each size. Bake them with the smallest sizes on one cookie sheet and the larger ones on another one to have more even baking.
Cool them completely. While they cool, prepare your ‘foundation’. I covered a cutting board and a cookie sheet with foil as my base. Mix up your icing (icing sugar and water with butter optional). Put ¼ cup of the icing in a separate bowl. Tint the remaining icing a bright green.
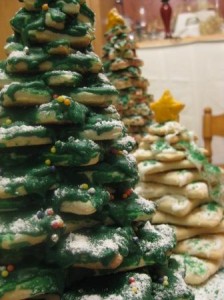
When the cookies are cool, put a dab of icing on the base where you would like to plant your tree. Then starting with the largest cookie, cover it in green icing. It does not need to be perfect, most of it will be covered! Place the iced cookie on the ‘planting spot’. Then ice the same-sized cookie, placing it on top of the other green star, but turn just slightly so that the points of the stars do not line up.
Continue in this pattern from largest to smallest. When you have one star left, ice it with the white icing and cover it in yellow sprinkles, or tint a tsp. of the icing yellow and ice the last tiniest star. Place it on the top of the tree on its side.
With the remaining white icing, decorate the base by making ‘snow drifts’. Sprinkle icing sugar over the tree and base carefully making it look like it is covered with freshly fallen snow. If you would like, you can buy tiny colored decorating balls to place in the wet icing to look like ornaments.
If you prefer less icing, do not ice the cookies before stacking, simply put a small dab of white icing in the center of each cookie as you stack them so that they stick together. Then sprinkle with green sugar, or pipe green icing on as desired, or ice them entirely with white icing instead of green to give it a ‘heavily laden with snow’ look. Another option is to color your cookies green before baking, then simply powder them with icing sugar.
Cover loosely with plastic wrap so the cookies don’t dry out. Allow it to set before transporting. This freezes well, although it will need to be removed from the base.

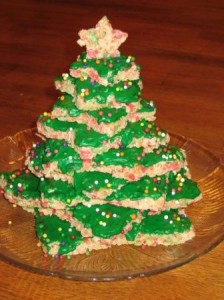
I have also made this with Rice Krispie Squares cut into stars. To do this, press out the freshly made mixture onto a large working surface (cutting board or cookie sheet you can cut on). Press it as thin as you possibly can. Cut out the star shapes, then set aside until they are firm. Then assemble as you would the sugar cookie tree.
Enjoy your tree! Be prepared to force your guests to take apart the tree, they won’t want to ‘ruin’ your masterpiece!
This post is part of the Virtual Advent 2009 Blog Tour.
About Carla Anne Coroy
Carla Anne can be described in one word: passionate. After just a few minutes with her it is evident that her biggest passion is people. Carla Anne is an accomplished Christian author, speaker and business woman. Her favourite way to spend her free time is hanging out with her 8 kids (an even mix of sons, daughters, and in-laws) and many family “add-ons”. In winter you can find her cheering for her local hockey team and in summer she’ll be on the beach!


